Times are a changing! Now that we have decided to do these video tutorials, it means that I have to be somewhat presentable when I am working on projects. I’m sure there are those of you who would sweetly say it’s not necessary, but I can assure you that a showered Shannon is much preferred over the version that got a sweaty run in and tidied up the house before running to the garage to get my paint on pre-shower! (which is the norm) It also means that I need to find an aesthetically pleasing work space. This is not my garage. My garage is filled with bins and bikes and pool noodles and so much more. I will admit that I look in the background of people’s pictures! I try not to judge if there is stuff lying around because it happens – but, when I posted the pic of my garage sale finds last week, all I could see was all of the crap in the background! So, I am trying to find a work space that us equally as presentable. For this cute plant stand, that happens to be my dining room. Sans dining room table. Work with me. We will get this figured out!
Watch my tutorial video below or continue reading my post to see the fun transformation!
While I am a big lover of refinishing dressers and tables, I do like to tackle something different now and then. When I came across this tall and somewhat awkward plant stand last week on my garage sale expedition and saw that it was only $5, I thought I’d give it a try. I love the twisty rope design on the spindles and the edges on the top, so I knew it would turn out pretty darn cute. (ignore the Nerf rifle and pool noodles – unless you want to take me on in a foam ammo battle. in that case, bring it on!)

People always assume that wooden furniture needs a lot of sanding before you get started. This is not the case. Milk paint and chalk paint both adhere easily to wood and porous surfaces – even varnished wood. They don’t always adhere well to super shiny surfaces. In those cases, I would recommend light sanding or even a primer such as Bullseye 123 Primer or something similar. It will grab onto the surface and give the paint something to adhere to. I learned this the hard way when I painted and then had to scrape and repaint the entire hombre dresser. There were tears shed that day! As I was saying, you don’t need to sand much, but I did sand the plant stand just a bit. There was some water damage on the top and the previous varnish was a little worn, so I sanded lightly to try to even it out.
When selecting paint for your project, it’s completely up to you and what you’re trying to achieve with your look. Sometimes I base what paint I use on whether I want to just run to Ankeny for a chalk paint color at Tweedle Dee or if I want to go to The Woodsmith Store in Clive for General Finishes milk paint. The ladies there are extremely helpful! They can answer your questions about paint colors, gel stain, stain glaze, and so much more! There are so many fun finishes that you can create with the General Finishes products but today we are keeping it simple. I prefer to use the milk paint because I think the coverage is amazing and it sands so nicely. With this table, I chose the color Linen because I wanted a little more creamy of an off white color.
When you start with your first coat, you’ll notice that the paint doesn’t completely cover. There will be wood grain coming through and you will notice brush strokes. Don’t be alarmed by this!! You don’t need to sand or try to slap on a thicker coat. That is exactly how it’s supposed to look. Make sure that you have all of your surfaces coated though. Inevitably, I always miss a spot on a spindle or a leg or somewhere that I think I can reach but can’t. That’s ok, too! You can always touch it up later or with your second coat. The only thing you need to be cautious of is drips or pools of paint. If it goes on thick in spots, it will stay thick. These areas can be sanded down but it takes much more elbow grease. Milk paint dries incredibly fast. I’m talking 30 to 60 minutes fast. You can paint another project while you’re waiting and your original one will be ready for the second coat by the time you’re done. It’s wonderful because you can get your project painted all in one day. Between coats, I always just grab a plastic grocery sack to wrap my brush in to make sure it doesn’t dry out. A handy tip that I learned from my mom, Carol!! One thing growing up, our walls were never drab. It’s the best way to freshen up a room and relatively cheap too. If only the coats went on this fast!
I love how my animals are so curious! Lewy will make several appearances throughout my tutorial as well. He doesn’t like to have his picture taken, but he doesn’t mind being an extra in a tutorial video! And I apologize for the shot of my buns at the end.
You’ll notice after the second coat that most of the wood grain is gone and the coverage is beautiful! However, sometimes wood grain does still show through. In that case, you have 2 options. Add a third coat if you want your furniture to be a solid color. Or, you can use that area as a spot for distressing. I personally think that it adds to the shabby chic appearance when you have that variance.
Once your coats have completely dried and it’s no longer tacky to the touch, you can begin your sanding. A 220 grain sandpaper works great. Just start lightly sanding on all of the edges. Wherever there is an edge, groove, corner, design, scratch, and so on, you can sand the paint to get to add that distressed look. 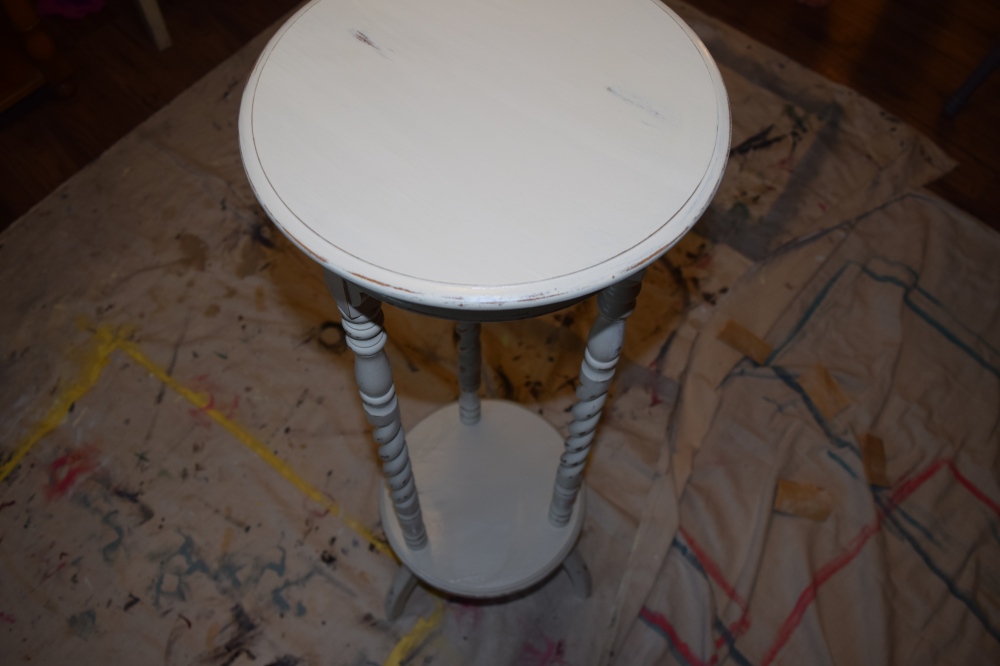
There are lots of edges on this adorable plant stand! Don’t be afraid to sand away. Anything that you don’t care for can easily be covered back up with a swipe of paint. Go to town, don’t be scared! You also might notice that the paint can look a little duller around where you’re sanding. Don’t worry about this either. Once you add a little varnish, it will even it all out.
Nice segue into my next step. The finish. There are several different ways that you can finish your furniture. Polyurethane, wax seal, polycrylic, and so on. I have used those three methods and each one has different positives and negatives. For this project, I think the Minwax Polyurethane is the best. You can purchase it in a can or the wipe on pour bottle. Both are available at a home improvement store or Walmart. I like to use the can because I’ve found the pouring container drips all of the time. The reason I chose this method is because it seals the best against water and with this being a plant stand, water spills are inevitable. It also gives a bit of a gloss to the paint and I think it makes the distressed areas pop. I will go into detail about the other methods in just a minute.
When using polyurethane, be extremely careful of the fumes. It is best to use it in a very well ventilated area and outdoors if possible. It is hotter than blazes outside right now, so working in the garage is not an option. I opened all of the windows and had a fan blowing to circulate the air as I was coating this piece. You also may want to wear a mask during this process. The fumes can hit you before you realize. If you start to feel dizzy or have a headache, stop what you’re doing and move to an area with some fresh air. Make sure to read the instructions before you get started.
Another thing that I love about the poly is that you can wipe it on. This makes it so easy! I use a glove (latex or non latex does not matter) and an old t-shirt cut into smaller pieces. You can also use an old sock as long as there aren’t a lot of fibers on it. Dip the cloth into your can of poly and try to squeeze some of the excess of – you want it saturated but not dripping. Just start gently wiping on in even strokes. You’ll want to try to not go over the same area twice because this can cause streaking. You will easily be able to tell what areas you have coated and what you haven’t as the poly adds a luster to your paint. I just love this part! This type of polyurethane is fast drying so I usually give it a few hours and then add another coat. Watch for drips and make sure that you don’t get it on too heavy. Heavy coating can cause yellowing later.
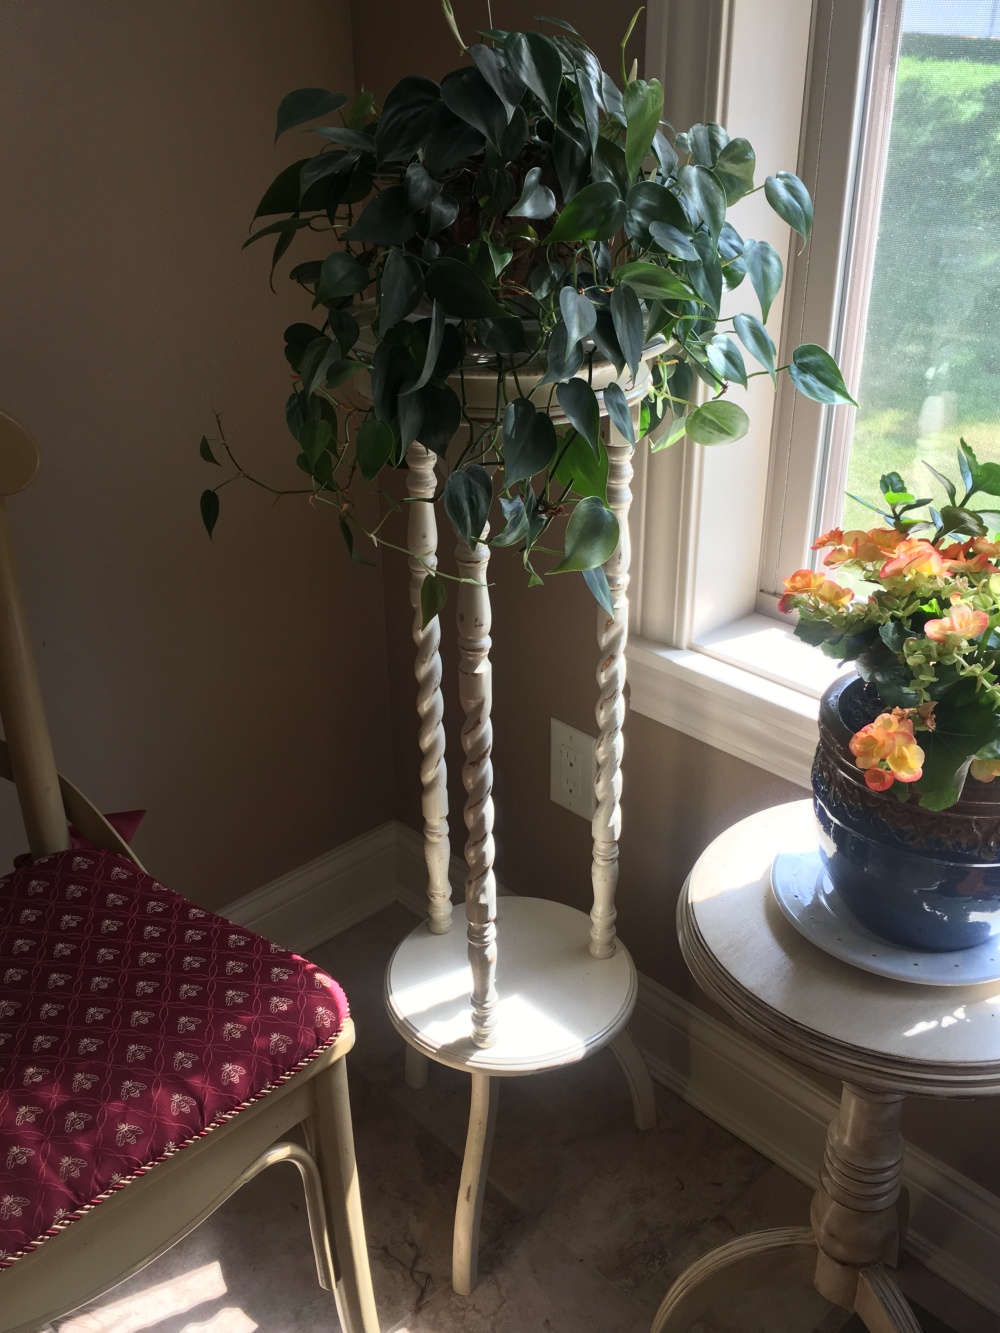
After the second coat, you are done! This was a super fun but relatively easy project to complete! This plant stand started out kind of drab but ended up beautiful! The distressing brings out such adorable detail! My mom snatched this one up as soon as the last photo shoot was done! It is now nestled next to her beautiful dining furniture from Boats in Pella and fits in perfectly! From a $5 garage sale find to a shabby chic masterpiece, I hope you love this one as much as I do!